The use of {{Area}} in the main name space is no longer supported. See Path of Exile Wiki:Manual of Style/area for the new area page template. |
Having proved your mettle in the Trials of Ascendancy, you earn the right to enter Izaro's Labyrinth. Centuries have passed, but its traps are as dangerous as the day its doors were first opened.
Description on the official Path of Exile website [1]
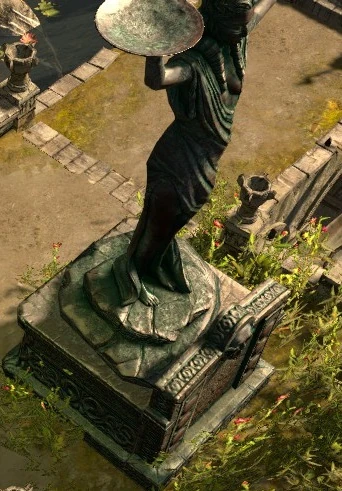

The Statue of the Goddess closed entrance

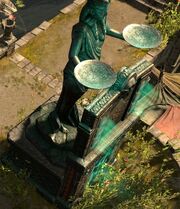
The Statue of the Goddess opened entrance
The Labyrinth is a randomly generated dungeon filled with traps, puzzles and monsters. After having completed the Trials of Ascendancy in the current difficulty level, the player can enter the Labyrinth through the Statue of the Goddess in The Sarn Encampment.
The traps from the Trials of Ascendancy and few other are combined in gauntlets throughout the Labyrinth. Its random level generation extends beyond single areas and affects the entire Labyrinth at once. Every day, the Labyrinth has a completely new layout. There are four different Labyrinths: one for each difficulty and one additional endgame dungeon. The layout is the same for every league, but differs in each difficulty. When the Labyrinth is generated, keys to locked doors are placed behind traps, hidden passages are created that connect areas and secret rooms are placed. Three times, the player encounters Izaro, and the fight will evolve depending on the player's actions in previous encounters. The first two fights end when Izaro's hitpoints are reduced to 2/3 and 1/3 respectively, the last one ends when Izaro is defeated. The last fight takes place in an arena containing many traps from the Labyrinth.
The Labyrinth takes an experienced player around 30 minutes to complete. Players can not portal out to town; if they leave the dungeon, they will have to start all over again. The Labyrinth can be attempted as many times as desired.
Completing the Labyrinth on normal difficulty grants the player the ability to choose an Ascendancy class on top of receiving two points to spend on the Ascendancy skill tree. On completing the cruel, merciless and endgame Labyrinth the player again receives two points each. In addition, every time the player completes the Labyrinth, he may imbue one piece of equipment with an enchantment.
There are daily leaderboards where players can compete to solve the Labyrinth the quickest. Players with the best results are rewarded in each difficulty.
Rooms
The Labyrinth is a series of connected areas. There are pedestals at each entrance/exit of the area that show areas that have been already visited and what rooms they have in them, as well as all connections to neighbouring areas.
Each area can have none, one, or multiple special rooms. Most of them are indicated at the map located on a pedestal adjacent to each entrance/exit from any one section of the labyrinth to another.
| Name | Sign | Notes |
|---|---|---|
| Blank | 
|
|
| Aspirant's Trial |  
|
|
| Forgotten Reliquary | 
|
|
| Gold Door | 
|
|
| Golden Key | 
|
|
| Silver Cache | 
|
|
| Silver Key | 
|
|
Traps
There are several different traps in the labyrinth. They can be deadly, usually dealing a percentage of the player's life or energy shield pool as physical damage. They deal damage that scales with the player's life and energy shield pool. Traps can also damage monsters, but they deal less damage to minions. The most common ones are introduced to the player in the Trials of Ascendancy.
Spike traps

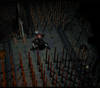
Spike traps
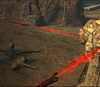
Spike traps shoot out of the ground in a square area, either via a timer or when its pressure plate is stepped on, taking 1/4 of the player's effective hitpoints (including life pool and energy shield pool), apply bleeding, and locking them in place. Spike traps are impassable and block movement while they are out.
Spike traps are showcased in the Trial of Piercing Truth, located in the Lower Prison.
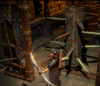
Sawblades
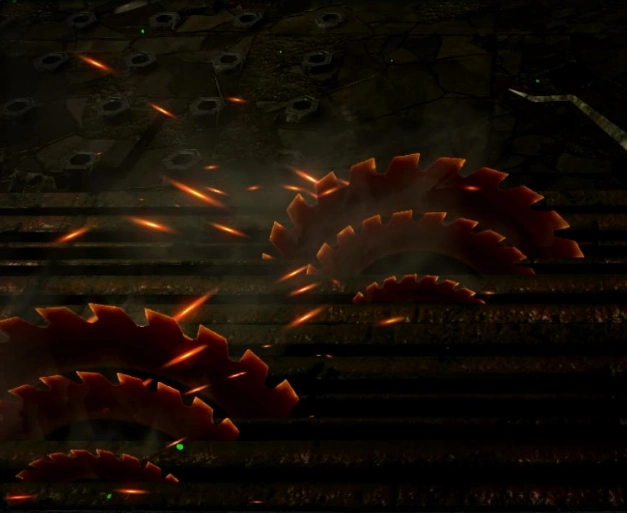

Sawblades
Sawblades run along a straight path, dealing a very large amount of physical damage over time on contact, enough to kill the player after one second of full contact. Sawblades can often be switched on and off with nearby levers.
Sawblade traps are showcased in the Trial of Crippling Grief, located in the Chamber of Sins Level 2.
Spinning blades

Spinning blades
Spinning blades follow a set path along the ground and deals a very large amount of physical damage over time, enough to kill the player after one second of full contact. Unlike sawblades, their paths go diagonally or take a turn. They can sometimes be diverted from one track to another by using activating levers.
Spinning blades are showcased in the Trial of Swirling Fear, located in the Crypt Level 1.
Furnace traps
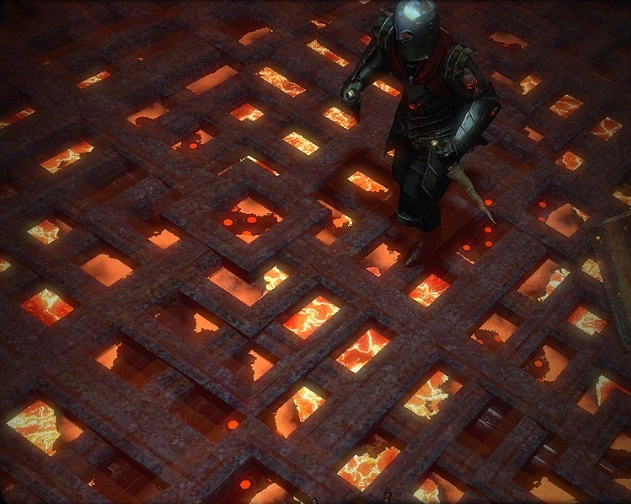
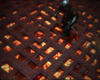
Furnace trap
Furnace traps periodically heat the floor with lava, dealing burning damage while standing over them, enough to kill the player after roughly four seconds (supposing the player has 75% fire resistance). Furnaces are often filled with cremators that spawn fire skeletons. These enemies do not take damage from the furnace.
Furnace traps are showcased in the Trial of Burning Rage, located in the Crematorium.
Blade sentries

Blade sentry
Blade sentries are very wide traps that move along set paths (either on the ground or flying above obstacles), dealing heavy physical damage over time, enough to kill the player after one second of full contact. They deal more damage the closer you are to the center.
Blade sentries are showcased in the Trial of Lingering Pain, located in the Catacombs.
Dart traps

Dart trap
Dart traps are fixed on a wall or pillar, firing projectile periodically or when a hidden pressure plate is stepped on. They deal physical damage and apply poison which greatly slows the player's movement speed.
Dart traps are showcased in the Trial of Stinging Doubt, located in the Hedge Maze.
Sentinel traps
Sentinel trap
Sentinel traps apply one of many effects to an area. Sentinel traps can be temporarily deactivated by dealing damage to them. They only appear in the endgame Labyrinth and in trials to endgame Labyrinth.
There are several variations of Sentinel Traps:
- Endless Drought: removes flask charges.
- Endless Hazard: casts multiple circles that deal physical damage equal to 20% of life + 12% of ES (if ES is protecting life) when a movement skill is used. The damage can be mitigated, but not avoided.[2]
- Endless Pain: casts an aura that increases damage taken.
- Endless Sting: causes bleeding.
- Unending Fire: casts Fire Nova.
- Unending Frost: casts
 Ice Nova.
 - Unending Lethargy: casts a Temporal Chains aura.
- Unending Storm: casts Shock Nova.
Sentinel traps are showcased in the endgame trials, which can randomly be found in maps.
Tile Puzzle
A tile puzzle room will be opened by stepping on three tiles in sequence in front of it. The sequence of the tiles outside will then need to be used to cross a grid of tiles to the reward. For example, if it has Fire, Lightning, Ice outside, then you must step in tiles in that order: Fire, Lightning, Ice, Fire, Lightning, Ice, etc. Crossing all the way will open the door to the reward. Stepping on an incorrect tile triggers a dart trap and resets the puzzle sequence.
Other traps
Various other traps appear in the Labyrinth, such as vertically moving spinning blades (often guarding an entrance) and others.
Unique items
The following unique items can be only found in the Labyrinth:
- Chitus' NeedleChitus' Needle
Elegant FoilOne Handed Sword
Quality: +20%
Physical Damage: (46.8-50.4) to (85.8-92.4)
Critical Strike Chance: 5.50%
Attacks per Second: 1.60
Weapon Range: 16Requires Level 30, 101 Dex+25% to Global Critical Strike Multiplier+30 to Strength
(140-160)% increased Physical Damage
+30 to maximum Mana
5% increased Movement Speed
30% increased Elemental Damage
+2 to Weapon Range"With this, I will weave the threads of fate
into a noose for our 'glorious' emperor."
- Chitus Perandus - Death's DoorDeath's Door
Crusader BootsQuality: +20%
Armour: 387
Energy Shield: 76Requires Level 64, 62 Str, 62 Int+(20-40) to Strength
200% increased Armour and Energy Shield
+(10-15)% to all Elemental Resistances
25% increased Movement Speed
+1 to Maximum Endurance Charges
50% increased Elemental Ailment Duration on you
Bleeding cannot be inflicted on youTo extend your life as long as possible
is to extend all the maladies that come with it. - GlitterdiscGlitterdisc
Burnished Spiked ShieldQuality: +20%
Chance to Block: 26%
Evasion: (148-161)
Energy Shield: (79-111)
Movement Speed: -3%Requires Level 27, 37 Dex, 37 Int4% chance to Dodge Attack Hits(120-140)% increased Evasion and Energy Shield
+(20-30) to maximum Energy Shield
+(30-50) to maximum Life
10% increased Rarity of Items found
25% chance to Avoid Fire Damage from Hits
You always Ignite while BurningIzaro's insistence on using lava
resulted in some surprising material discoveries. - Izaro's DilemmaIzaro's Dilemma
Imperial ClawClaw
Quality: +20%
Physical Damage: (72-81) to (184-207)
Critical Strike Chance: 6.00%
Attacks per Second: (1.76-1.84)
Weapon Range: 11Requires Level 68, 131 Dex, 95 Int+46 Life gained for each Enemy hit by Attacks(40-60)% increased Physical Damage
Adds 20 to 50 Physical Damage
(10-15)% increased Attack Speed
+(300-400) to Accuracy Rating
100% increased Global Physical Damage while FrozenIzaro saw himself not as a man,
but as a divine saviour trapped in a man's body. - Izaro's TurmoilIzaro's Turmoil
Crimson Jewel(18-25)% increased Fire Damage
(18-25)% increased Cold Damage
2% chance to Ignite
2% chance to FreezeThe once-glorious emperor spent his final days
imprisoned in his greatest creation;
a tool to filter out the unworthy
that pushed a monster to power.Place into an allocated Jewel Socket on the Passive Skill Tree. Right click to remove from the Socket. - Spine of the First ClaimantSpine of the First Claimant
Iron SceptreSceptre
Quality: +20%
Physical Damage: (39.6-46.8) to (59.4-70.2)
Critical Strike Chance: 6.00%
Attacks per Second: (1.47-1.54)
Weapon Range: 11Requires Level 20, 38 Str, 38 Int14% increased Elemental Damage(100-140)% increased Physical Damage
40% increased Damage with Hits against Frozen Enemies
+(25-35)% to Cold Damage over Time Multiplier
(30-50)% increased Cold Damage
(5-10)% increased Attack Speed
(4-8)% increased Cast Speed
5% chance to FreezeThousands gazed upon the doors of the great labyrinth,
at an Eternal Champion in steel and gold,
The first to challenge its treacherous traps.
To mark the occasion, Izaro had the Champion's remains gilded. - Viper's ScalesViper's Scales
Full Scale ArmourQuality: +20%
Armour: (312-343)
Evasion: (312-343)
Movement Speed: -3%Requires Level 28, 43 Str, 43 Dex(80-100)% increased Armour and Evasion
+(30-40) to maximum Life
+(15-25)% to Cold Resistance
5% increased Movement Speed
20% chance to Poison on Hit with Attacks
Cannot be PoisonedSwift and silent.
One strike, one corpse. - Winds of ChangeWinds of Change
Ancient GauntletsQuality: +20%
Armour: 184Requires Level 47, 68 Str+(30-60) to maximum Life
30% increased Projectile Speed
(10-5)% reduced Movement Speed
10% chance to Knock Enemies Back on hit
(30-50)% increased Projectile DamageIzaro was slow to see the treachery growing in his own court
and powerless to stop it once he had;
a captain sailing his own ship into rocks. - Xirgil's CrankXirgil's Crank
Coiled StaffWarstaff
Quality: +20%
Physical Damage: 32.4-68.4
Critical Strike Chance: 6.20%
Attacks per Second: 1.30
Weapon Range: 13Requires Level 28, 43 Str, 43 Int+20% Chance to Block Attack Damage while wielding a Staff+15% Chance to Block Attack Damage while wielding a Staff
(60-80)% increased Spell Damage
+(70-100) to maximum Energy Shield
+1 to Level of all Spell Skill Gems
Reflects 1 to 150 Lightning Damage to Melee Attackers
20% chance for Energy Shield Recharge to start when you Block"Since one with knowledge of machines
might be able to bring the labyrinth to a standstill,
Izaro had us place many boobytrapped decoys.
But I know which switch brings the monster down."
- Xirgil, Trapbuilder's final words.
It is currently unknown if they can be obtained using an ![]() Orb of ChanceOrb of ChanceStack Size: 20Upgrades a normal item to a random rarityRight click this item then left click a normal item to apply it.
Orb of ChanceOrb of ChanceStack Size: 20Upgrades a normal item to a random rarityRight click this item then left click a normal item to apply it.
Shift click to unstack.![]() while being outside of the labyrinth.
while being outside of the labyrinth.
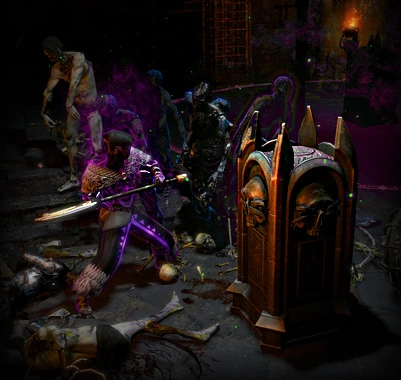
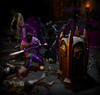
Chests
| Name | Location | Notes |
|---|---|---|
| Silver Chest | Contains a | |
| Golden Chest | Contains a | |
| Curious Lockbox | Silver Cache | Contains a |
| Izaro's Treasure | The end of the labyrinth | Can be opened with a Treasure Key |
| Decorative Chest | Forgotten Reliquary | Contains a Trinket |
| Intricate Locker | Silver Cache | Always contains a labyrinth unique item |
| Emperor's Charts | Silver Cache | Maps, only tier 1 and shaped tier 1 |
| Emperor's Gifts | Silver Cache | Assorted items, higher rarity and quantity |
| Emperor's Trove | Jewelry, jewels and currency | |
| Emperor's Treasury | Silver Cache | Jewelry, jewels and currency |
| Emperor's Vault | Silver Cache | Jewelry, jewels and currency |
| Guard Vault | Behind the locked door with puzzle | Assorted items (probably higher rarity and quantity) |
| Hidden Chest | ||
| Hidden Coffer | Assorted items | |
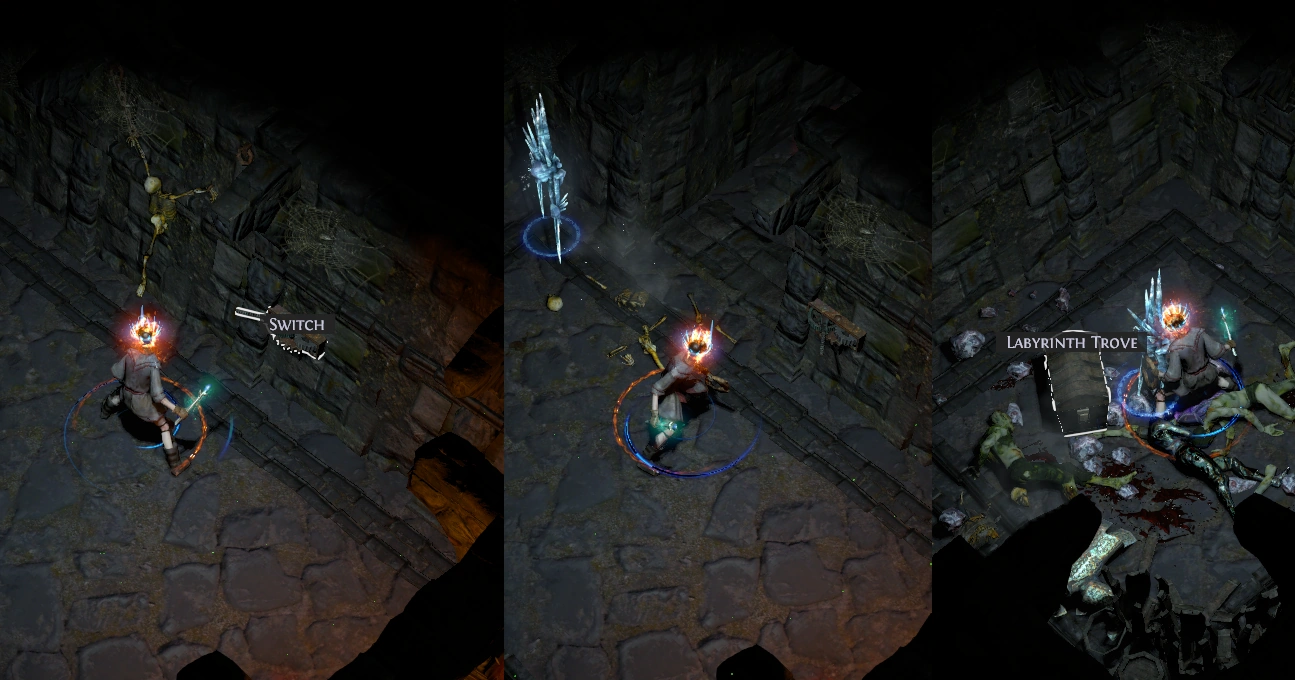
| Labyrinth Trove | Assorted items (probably higher rarity and quantity) | |
| Supply Cache | Assorted items | |
| Battle Supplies | Assorted items | |
| Ascendant's Treasure | Assorted items | |
| War Spoils | Silver Cache | Assorted items (probably higher quantity) |
| Warmonger's Cache | Silver cache | Weapons and currency |
Endgame Labyrinth
The fourth labyrinth (also called the Uber Labyrinth) is accessed differently, through end-game maps. Completing the trials in maps reward players with an ![]() Offering to the GoddessOffering to the GoddessIt is time for the Goddess to give her final verdict.
Offering to the GoddessOffering to the GoddessIt is time for the Goddess to give her final verdict.
Your fate rests in her even hands.Travel to the Aspirants' Plaza and spend this item to open the Eternal Labyrinth. You must have completed the six different Trials of Ascendancy found in Maps in order to access this area.![]() , which needs to be used in the map device in order to enter the endgame labyrinth.
, which needs to be used in the map device in order to enter the endgame labyrinth.
The endgame trials and labyrinth include a new trap type: Sentinel traps. These traps apply one of many effects to an area and can be temporarily deactivated by dealing damage to them. Upon completing the endgame labyrinth for the first time, players are rewarded with two additional ascendancy points and a new tier of possible enchantments.
The monster level for the endgame Labyrinth is 75.
Leaderboards
Players are ranked based on how quickly they have completed the Labyrinth. To be eligible for the leaderboard, players must enter the Labyrinth alone. The Labyrinth must be completed before the daily changeover to the next labyrinth layout. There are leaderboards for all four labyrinths in each league, resulting in 16 different leaderboards.
- Players are timed from when they enter the portal in Sarn Encampment until they kill Izaro.[3]
- To be eligible for the normal leaderboards, players must be level 40 or lower and must not have started cruel yet.[4]
- To be eligible for the cruel leaderboards, players must be level 60 or lower and must not have started merciless yet.
- There are no level restrictions for the merciless and endgame leaderboards.
At midnight UTC, prizes will be deployed to the players who finished the Labyrinth the quickest that day. The prizes received depend on the difficulty level. For every leaderboard, the top player will be rewarded, so each reward will be distributed four times every day.
- Emperor's CunningEmperor's Cunning
Viridian JewelLimited to: 120% increased Global Accuracy Rating
3% increased Character Size
(4-6)% increased DexterityThe greatest victories happen
before the battle has begun.Place into an allocated Jewel Socket on the Passive Skill Tree. Right click to remove from the Socket. will be rewarded to the top player in normal difficulty - Emperor's WitEmperor's Wit
Cobalt JewelLimited to: 130% increased Global Critical Strike Chance
3% increased Character Size
(4-6)% increased IntelligenceThe greatest victories happen
before the battle has begun.Place into an allocated Jewel Socket on the Passive Skill Tree. Right click to remove from the Socket. will be rewarded to the top player in cruel difficulty - Emperor's MightEmperor's Might
Crimson JewelLimited to: 110% increased Damage
3% increased Character Size
(4-6)% increased StrengthThe greatest victories happen
before the battle has begun.Place into an allocated Jewel Socket on the Passive Skill Tree. Right click to remove from the Socket. will be rewarded to the top player in merciless difficulty - Emperor's MasteryEmperor's Mastery
Prismatic JewelLimited to: 14% increased maximum Life
3% increased Character Size
5% increased Global Defences
(5-7)% increased AttributesLearn as much as you can,
and surround yourself with people who know the rest.Place into an allocated Jewel Socket on the Passive Skill Tree. Right click to remove from the Socket. will be rewarded to the top player in the endgame labyrinth
Secrets
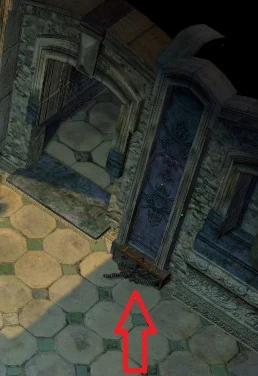
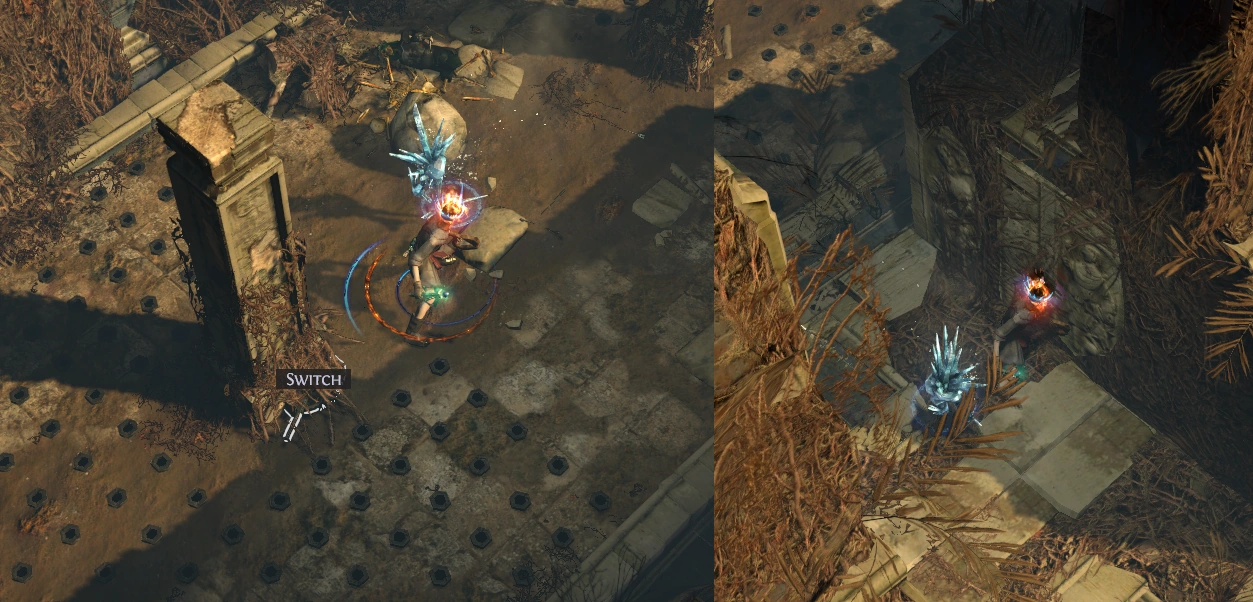
Hidden switch opens a room that doesn't show on map

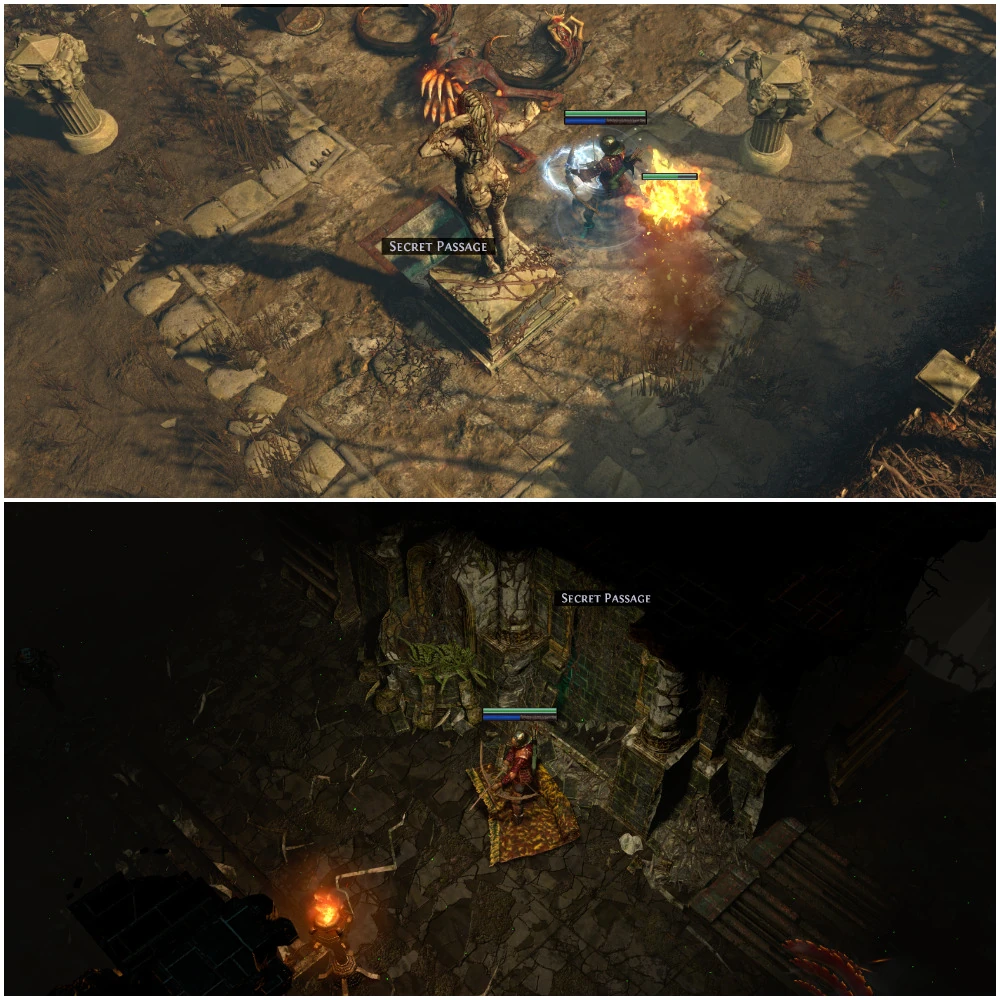
Secret passage and one of the possible exits

Opens a room containing a chest
Drops a large wall between two trap settings
A statue in Domain Enclosure that when moved, reveals a hidden passage leading to Basilica Annex.
Version history
| Version | Changes |
|---|---|
| 2.3.1 |
|
| 2.3.0 |
|
| 2.2.2 |
|
| 2.2.1d |
|
| 2.2.1 |
|
| 2.2.0 |
|
References
- ↑ Path of Exile. "Ascendancy Classes". Official Path of Exile website.
- ↑ Mark_GGG (July 19, 2016). "Mechanical Questions Thread". Official Path of Exile Forums. Retrieved July 19, 2016.
- ↑ RhysGGG (April 15, 2016). "Labyrinth Ladder times are messed up". Official Path of Exile subreddit. Retrieved May 28, 2016.
- ↑ Bex_GGG (April 13, 2016). "Content Update 2.2.2 Announcement". Official Path of Exile website. Retrieved April 13, 2016.